
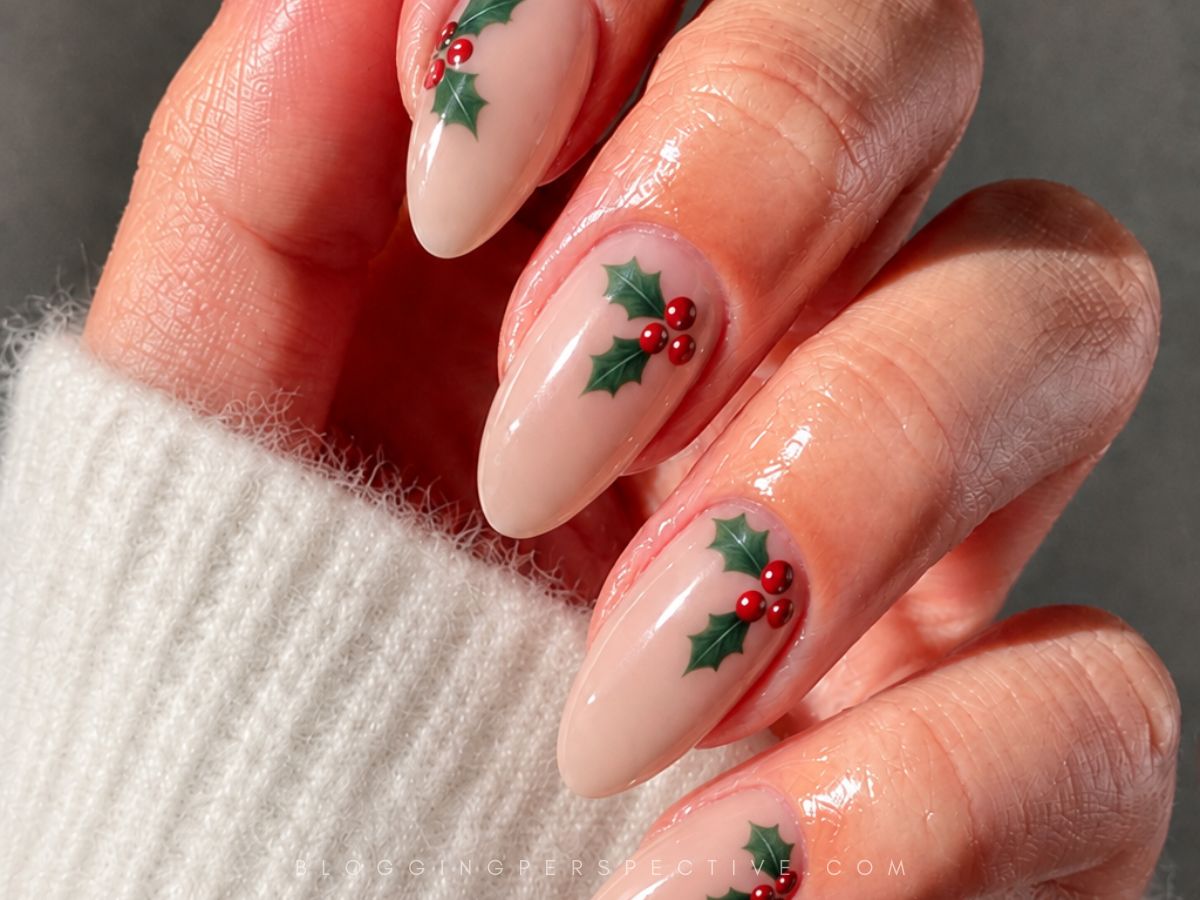
Tiny holly leaves can make even a simple manicure feel ready for Christmas. Add a few berries, a little sparkle, or a French tip, and you’ve got plenty to play with!! These twenty ideas range from barely-there details to glittery holiday nails, so you can pick how festive you want to go.
Getting Those Tiny Holly Details Right
Holly nail art gets crowded fast if the leaves and berries are too big. Start smaller than you think you need to, especially on short nails. A little space around each detail helps you actually see the design.
You don’t need to squeeze a whole branch onto every nail, either. A small leaf cluster or a few berry dots can do plenty.
If you’re painting it yourself, practice the shapes on a nail art practice tip before working on your manicure.
- Thin Brush – Use a fine nail art brush for leaf edges and branches so the lines don’t swallow the tiny details.
- Small Berry Dots – Pick the small end of a dotting tool and use light pressure to keep berries from turning into one big blob.
- Room For Leaves – Leave visible base color around the holly, particularly when you’re adding dots or glitter too.
- Dry Between Details – Let regular polish details dry before adding nearby colors. With gel, follow the product’s curing instructions and keep uncured product off your skin.
- Base Color Contrast – Choose leaf and berry shades you can clearly see against your base, not just shades you like in the bottle.
- Gentle Top Coat – Once regular polish art is dry, apply top coat with a light touch instead of repeatedly brushing over the design.
Fine Lines On French Tips
The outlined holly berry accents give these white French tips a lighter feel than filled-in art. I like how the outlines keep the little details from looking heavy. Use a fine nail art brush with just a small amount of polish to keep those lines narrow. If your first outline looks thick, make the next one smaller rather than adding more detail around it.
Polka Dots Meet Little Leaves
A neutral base lets the holly leaves and polka dots share the attention. It’s playful, but there’s still some breathing room. Place the leaves first, then add dots in the open spaces instead of filling every gap. You can use fewer dots if you want a quieter version.
Short Nails With Sweet Dots
Short, round nails look so sweet with this sheer polka-dot base and little holly accents. You don’t need extra length to make the details work. Build the sheer base in thin coats, stopping before it looks opaque. Keep the dots smaller than the holly accents so the two don’t compete.
Chrome Holly Along The Side
The holly berry vine runs along the side of these white French tips, with raised details that add texture. This one has a little more going on!! If you’re trying it, use products specifically intended for nail decoration and follow their application instructions. Keep the raised pieces low and away from the free edge if you’re worried about snagging. Ask your nail tech for a flatter version if texture tends to bug you.
Leafy Tips On Short Square Nails
Holly leaves become part of the tips on these short square nails, with a white tip accent alongside them. The square edge gives the leafy shapes a clear place to sit. Size the leaves to the width of each nail instead of copying one size across the whole hand. Keep the white accent narrow so it doesn’t crowd the leaf shapes.
Golden Tips With Holiday Holly
Gold glitter tips add sparkle while the neutral base keeps the holly berry accents easy to spot. This feels ready for a Christmas party without glitter covering every inch. Dab the glitter onto the tips in thin layers rather than dragging a thick stripe across them. Leave a little clear space around the holly so its edges stay readable.
Holly Against Dark Glittery Backdrop
Red glitter makes the whole base feel festive before the holly berry accents even come into play. This is the louder option, and I’m into it. Use an opaque nail art polish for the holly so it doesn’t disappear into the sparkle. Build the glitter base in thin coats to avoid a bulky finish.
Playful Tips With Branch Outlines
Red and white tips get a delicate touch from the outlined holly branches. The mix of solid tips and fine lines keeps the design interesting. Aim for a similar tip depth across both colors so the manicure feels balanced. For the branches, try short connected brushstrokes instead of forcing one long line.
Pink and Red Stripes With Glittery Leaves
Red and pink stripes make this holly design feel extra playful. The green glitter leaves add another little flash of shine. Paint the stripes with a fine brush and let each color dry before working right beside it. If the pattern feels busy on your nails, use thinner stripes and keep the leaf accents small.
Sweet Pink With A Holly Accent
Red and pink base nails bring the color, while a holly accent nail handles the tiny artwork. You can get a festive manicure without painting leaves on every finger. If you’re doing your own nails, save the accent until the plain base colors are finished so you can focus on one detailed nail. Choose a softer pink for a gentler contrast or a brighter pink if you want more pop.
A Little Garland Across Milky Nails
The holly garland sits in the middle of a milky white base, like a tiny decoration across the nail. I like that the placement leaves space above and below the art. Keep the garland narrow if you’re working with short nails. Apply the milky polish in thin coats so the base stays soft rather than turning into a thick white layer.
Tiny Holly On Every Tip
Every nail gets a tiny holly accent here, so the French tips feel festive without needing one big centerpiece. The small scale is the whole point. Keep each holly cluster roughly the same size as you move from nail to nail. On your pinky, shrink the art a little so it still has room to breathe.
Green French With Leafy Details
Green French tips give this milky white manicure its Christmas color, with a holly leaf accent adding the detail. It’s a fun switch from the usual white tip. Keep the green band slim if you want the milky base to stay visible. You could try a softer olive green for a more muted version, while keeping the same leaf design.
Burgundy Sparkle With Soft Holly
Burgundy glitter nails sit alongside holly art on a sheer pink base. The lighter accent gives your eyes a little break from all that sparkle. Use a separate, clean brush for the sheer pink polish so stray glitter doesn’t end up in it. Keep that accent base translucent if you want the holly detail to remain the focus.
Gingerbread Meets Peppermint And Holly
Gingerbread, peppermint, holly, and polka dots make this feel like a whole Christmas treat assortment. There’s a lot to enjoy here!! On shorter nails, simplify each little motif instead of trying to squeeze in every tiny line. Add the polka dots last, and stop while there’s still space between the larger designs.
Classic French With Berry Accents
These white French tips keep things familiar, then the holly berry accents bring in Christmas. It’s an easy choice if you don’t want an all-over pattern. For shorter nail beds, try a narrower white tip so there’s enough space for the berries. A light touch with your dotting tool will help keep the berry shapes separate.
Shimmery Tips With A Holly Branch
Green shimmer tips bring the shine, and a holly branch adds a more detailed touch. This one feels festive without a full glitter base. Apply the shimmer in thin layers so the tip edge stays neat. Before painting the branch, check how much space you have and shorten the design rather than squeezing the leaves together.
Sparkly French With Berry Swirls
A glitter base, white French tips, and holly berry swirls give this manicure plenty of movement. The curved accents make it feel less predictable than a straight little branch. If you’re copying the swirls, build each curve with small brushstrokes and add the berries afterward. Choose a less dense glitter polish if you want those fine curves to stand out more clearly.
Little Holly On A Neutral Base
A neutral base keeps the attention on the holly leaves and berries. This is the one I’d point you toward if you want the tiny art to do all the talking. Choose a neutral shade that gives the leaf and berry colors enough contrast to show up clearly. Keep the berry dots smaller than the leaves so the little cluster stays easy to read.