
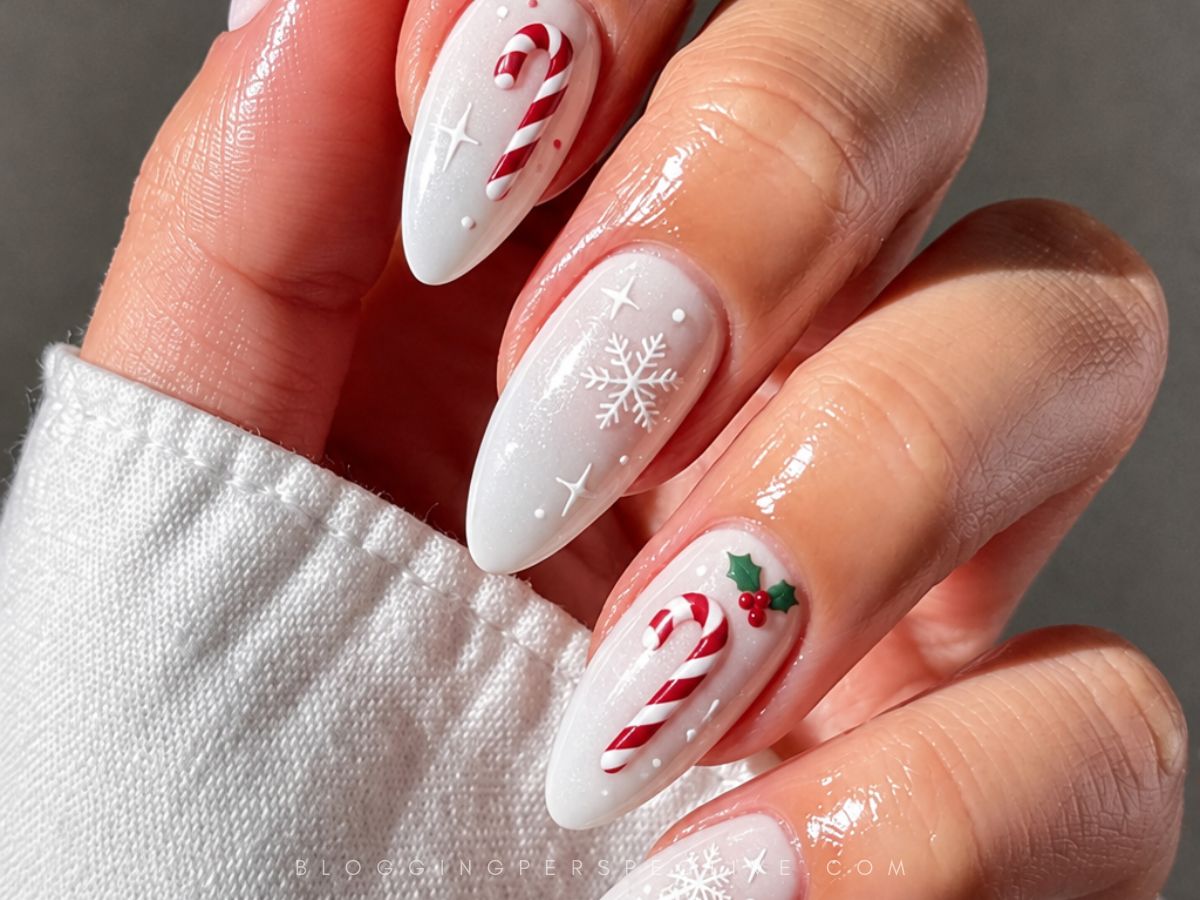
Candy canes have a very recognizable wardrobe, and those little stripes translate surprisingly well to a manicure.
They’re cheerful, unmistakably Christmassy, and playful enough to make your usual polish feel a little less serious.
With candy cane nails, you can borrow the holiday charm without decorating every fingertip like a Christmas shop window. A small striped detail can be just as appealing as a more festive set.
Candy Stripes Beyond The Red Tip
The little twist is what makes candy cane nails fun. Diagonal stripes give you that familiar candy-wrapper feel, while peppermint swirls turn the same idea into something rounder and more playful.
Keeping the pattern at the tips leaves breathing room; one accent nail makes it a small surprise.
You don’t have to stick with a white background, either. The ideas here include sheer neutral bases, soft pink, sky blue, glossy red, and plenty of glitter.
I like choosing one main detail first. Then a bow, gold mark, or silver chrome tip can be the supporting act.
Before painting, decide how much space your stripes and swirls need. Wider gaps help tiny patterns read clearly, especially beside glitter.
For dimensional details, use charms and attachment products made for nail art. If you’re using gel, follow the product instructions and keep uncured gel off your skin.
Not sure which version you want to try? These seven design details give you a few very different starting points.
- Candy Stripe French Tips – Red and white stripes stay along the tips, leaving a neutral base visible instead of covering the whole nail.
- Peppermint Swirl Accents – Curved candy patterns break up straight stripes and solid nails; use one as the focal accent if you want less detail.
- Glossy Red Nails – Solid glossy red gives a pink stripe or white swirl accent something simple to stand against.
- Glitter Tips And Bases – Keep sparkle at the French tips for a smaller dose, or choose glitter nails with a candy accent for more shine.
- Mini Candy Cane Charms – Tiny charms add dimension to a sheer neutral base without needing a full painted stripe pattern.
- Bows And Snowflake Details – Bow accents and snowflake motifs add a second holiday detail; painted marks feel flatter than the raised bow option.
- Silver Chrome Accent Tips – One silver chrome tip interrupts the red and white French pattern with a little metallic contrast.
As you browse, pick the detail you’d miss if it disappeared: the swirl, the sparkle, or that tiny bow. You can keep that part and simplify the rest without losing the candy cane mood.
Soft Stripes With A Sweet Twist
Soft pink and white candy cane accents make this neutral base feel sweet without going all-in on red. The lighter palette keeps the pattern gentle rather than loud. If you’re recreating it, leave consistent gaps between the stripes so the two pale shades don’t blur together. You can also make the pink stripe slightly wider for a little more definition.
Tiny Candy Canes On A Neutral Base
Those mini candy cane charms bring the detail, while the sheer neutral base stays quiet. I like this direction when you want a festive motif without a whole striped manicure. For your version, use charms and attachment products specifically made for nail art, following their instructions. Position the charms away from the cuticle edge so you have room to attach them neatly.
Snowflakes and Sweater Texture Meet Candy Swirls
White and red candy cane swirls share the design with red bows and snowflake details. This one has a playful mix of motifs instead of repeating one stripe pattern. If that feels like too much to paint, keep the swirls and choose either a bow or a star as your extra accent. You still get the same cheerful direction with fewer tiny details to manage.
A Sparkly Base For Swirled Tips
A glittery neutral base makes the red and white swirl tips feel a little dressier. The candy pattern stays near the ends, so the sparkle has its own space. If you’re choosing polish for a similar look, try fine glitter rather than large pieces beneath the painted curves. It’ll leave you a less textured surface for the tip art.
Stripes With Bows And Snowflake Texture
This is the extra-detail option: red and white stripes, 3D bows, and snowflake accents. The raised bows add actual dimension rather than just another painted shape. For a less textured version, keep a bow on one or two nails and let the stripes fill the other accent spots. Use nail-art bows with the recommended nail attachment product, not craft decorations.
A Chrome Tip Crashes The Candy Party
The single silver chrome tip is such a fun interruption here. It sits alongside red and white striped French tips on a neutral base, adding shine without turning every nail metallic. Decide which finger gets the chrome before you begin, especially if you want to keep it to one accent. Repeat the striped tip depth on the other nails to give the mix some consistency.
Candy Stripes Take A Blue Detour
Sky blue gives the red and white candy cane accents a totally different backdrop. The stripes still carry the holiday theme, but the base feels light and playful. When recreating the look, build the blue in thin coats and let each layer dry or cure according to its instructions before adding the art. A smooth background makes those small stripe edges easier to control.
Snowflakes Join The Peppermint Swirl Party
There’s a little of everything here: a neutral base, red glitter tips, candy cane swirls, and snowflake accents. The clear space around the details matters when you’re mixing this many ideas. To scale it down, try one small snowflake on a nail that doesn’t already carry your busiest swirl. That lets both motifs show up without cramming them together.
Diagonal Stripes Go All In
White nails with red diagonal stripes get straight to the candy cane idea. No extra charms or glitter needed. Paint one guide stripe on each nail first, then use it to keep the rest at a similar angle. If your nails have less space, use fewer stripes rather than crowding in the same number you’d put on a longer nail.
Just A Little Candy At The Tips
A neutral base keeps these red and white striped French tips feeling light. You get the candy detail right at the edge instead of across the full nail. Choose your tip band depth before painting, leaving enough room for both stripe colors to show. For a more understated version, make the band thinner and skip any extra accents.
Peppermint Swirls Change The Whole Mood
Red tip accents and peppermint swirl nails make this neutral base feel playful without covering every bit of it. I like the contrast between a simple tip and a more detailed candy pattern. For your swirl, mark a small center point and work outward with a fine nail-art brush. Keep that center open enough that the curved lines don’t merge into one thick patch.
Full Glitter With A Candy Twist
Red glitter, white glitter, and candy cane stripe accents make this the sparkle-heavy option. The two glitter shades give you contrast even before the stripes come in. If you’re adapting it, pick a finer glitter for the nail that carries the painted pattern. It’ll help the stripe edges stay distinct instead of competing with larger glitter pieces.
French Tips With A Golden Wink
Pink French tips take a sweeter turn with a red candy cane accent and gold detailing. There’s a little contrast, a little shine, and still a clear tip-focused design. To simplify it, choose one small gold mark instead of adding metallic lines around every detail. That keeps the candy accent from competing with the shimmer.
A White Accent Cuts Through Glitter
A white candy cane stripe accent gives the red glitter nails a bright break. It’s a clear focal point among all that sparkle. When painting your version, leave enough white showing between the stripes to preserve that contrast. If the accent nail is small, widening the gaps can work better than trying to fit more lines.
One Candy Cane Among The Sparkle
Red glitter nails make the white accent with its candy cane design stand out right away. This is a fun choice if you’d rather paint one recognizable candy motif than repeat stripes across the whole set. For your version, sketch the cane’s curved outline with a fine nail-art brush before adding any interior stripes. Keep it small enough to leave a little white space around the edges.
French Tips With Outline
The white swirl tips feel playful, and the red heart candy cane details lean into that sweetness. It’s a softer approach to the motif than straight diagonal stripes.
One Striped Nail Breaks Up The Gloss
Sometimes one accent is enough. Glossy red nails give the red and white accent a bold, simple backdrop, so you don’t need extra motifs to make it feel festive. Practice the curve on a nail practice tip before tackling your accent nail. Start with the larger sweep, then add the smaller lines instead of squeezing everything into the center.
A Crisp Base With One Striped Surprise
White nails let a single red and white candy cane stripe accent grab the attention. The solid base keeps the overall design simple, even with a bright pattern in the mix. Use a fine striping brush for the red lines rather than trying to paint them with the polish bottle’s brush. Let the white layer set according to its product instructions before starting the stripes.