
Welcome to the ultimate guide on how to achieve a perfect manicure at home!
Taking care of your nails and creating beautiful nail art is not only a form of self-expression but also a fun and rewarding experience.
In this comprehensive article, we’ll cover everything you need to know to master the art of DIY manicures and elevate your nail game.
Step 1: Tools for a Perfect DIY Manicure
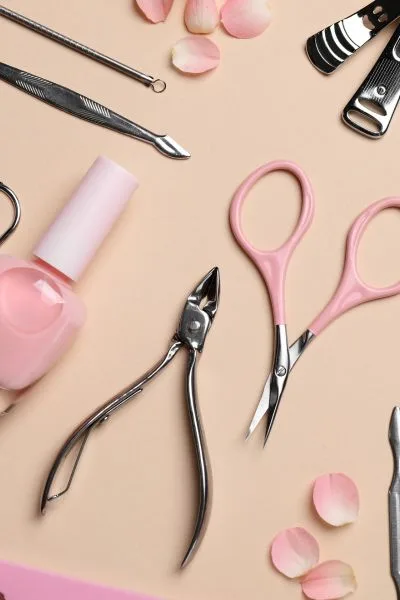
Having the right tools is the first step towards achieving salon-worthy nails at home.
While the basic tools like nail clippers, nail file, cuticle pusher, and nail polish are essential, let’s dive deeper into some additional tools that can take your manicure to the next level:
- Nail Clippers: Start with a good pair of nail clippers to trim your nails to the desired length before shaping them.
- Nail File: A high-quality nail file is essential for shaping and smoothing the edges of your nails. Opt for a fine-grit file to prevent unnecessary damage.
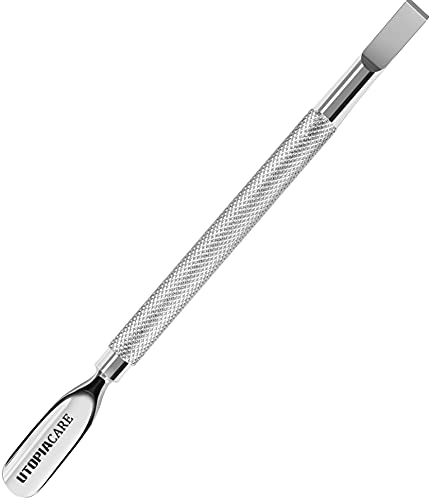
- Cuticle Pusher: A cuticle pusher helps gently push back the cuticles, creating a clean nail bed for polish application.
- Cuticle Trimmer: For those with excess or overgrown cuticles, a cuticle trimmer or nipper can be used to carefully remove any excess skin.
We recommend:


- Nail Buffer: A nail buffer helps create a smooth and shiny surface on your nails. It can also be used to gently remove ridges and imperfections.


- Base Coat: Applying a base coat is crucial for protecting your natural nails from staining and creating a smooth surface for nail polish.
- Top Coat: Seal the deal with a top coat to add shine, protect the polish, and extend the life of your manicure.


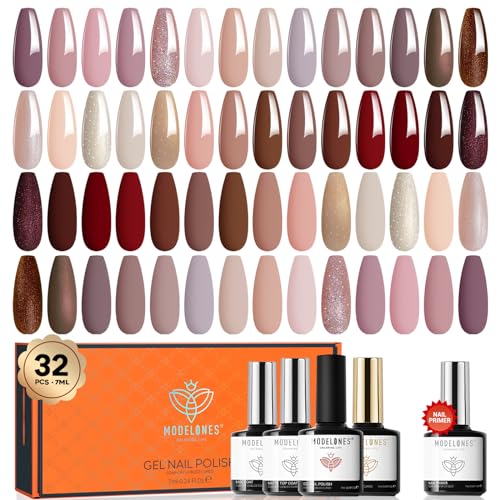
- Gel Nail Polish: Choose your favorite nail polish color to express your personality and style. From classic reds to trendy pastels, the choices are endless!


- Acetone: When it’s time to change your nail color, a nail polish remover (acetone for gel nails) will do the trick. Opt for non-acetone removers for regular nail polishes (not for gel nail polish).
- Cotton Pads: Use cotton pads or balls with acetone for easy and efficient nail polish removal.
- Gel Nail Polish Remover: As an alternative to acetone, you can try a specialized gel nail polish remover. You paint it on your nails just like a nail polish, wait, and like magic, your gel nail polish will start coming off.


If you have all of the above, you are all set for a perfect manicure at home. However, for a more advanced manicure look, consider the following tools as well:
- Nail Stamping Kit: For those interested in nail art, a nail stamping kit is a fun addition to your manicure arsenal. It allows you to transfer intricate designs onto your nails with ease.
- Nail Art Brushes: These little guys are probably THE most important tools you can own for doing nail art. Whether you’re trying to paint a flower, a line, or a swirl – you’ll want a quality set of fine nail art brushes in your toolset.
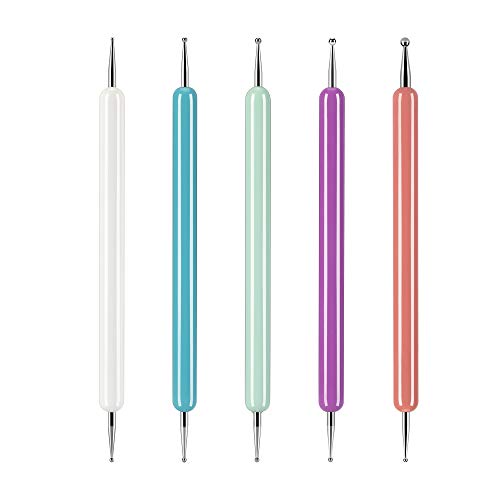
- Dotting Tools: Get creative with dotting tools! They come in various sizes and are perfect for creating polka dots and intricate designs.
- Striping Tape: Add clean lines and geometric patterns to your nails with striping tape. It’s an easy way to achieve a professional look.
- Chrome powder: Chrome nails are very trendy right now, and they’re super easy to achieve with some chrome powder and a no-wipe top coat.


Using Gel Nail Polish At Home
Wondering if you can successfully use gel nail polish at home? Absolutely! Gel nail polish is a popular choice for its long-lasting and chip-resistant properties.
It’s a bit more involved than regular polish, but with practice, you can achieve salon-quality results at home.
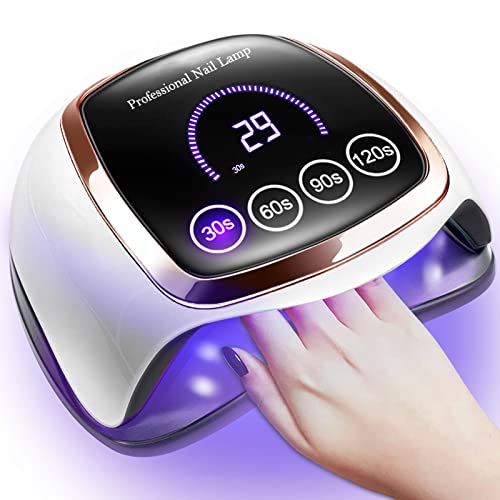
You will need a UV or LED lamp to cure it properly.

Also read: 9 Skincare Mistakes Most People Make
Step 2: Nail Prep
Once you have your tools ready to go, it’s time to start your manicure, and yo should always start with nail prep!
Prepping your nails properly is the key to a long-lasting and flawless manicure. Let’s delve into the preparation process in more detail:
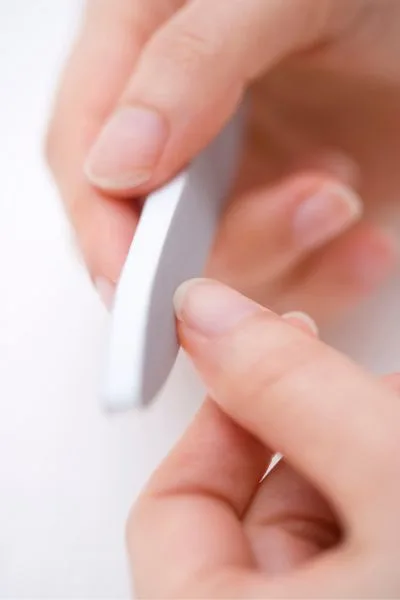
1. Shape Your Nails
Choose a nail shape that complements your hands and style. Whether it’s square, round, oval, squoval, almond, coffin, or stiletto, filing your nails to the desired shape is the first step.
2. Soften Cuticles
The best and least messy way to soften the cuticle is by using a cuticle remover product – not only can this soften your cuticles in just a minute or two, but it also helps remove it. You may not even need to use cuticle nippers after using the cuticle remover and a pusher!

3. Push and Trim Cuticles
After leaving the cuticle remover on for a time specified on your chosen product’s packaging, take a cuticle pusher and gently push back your cuticles. You should see a lot of the cuticle coming right off.
Keep using the pusher to gently remove as much of the cuticle as you can, wiping off your cuticle pusher on a paper towel. Once you’re done, assess the situation. If you’re using a quality cuticle remover product, your nails should already look nice and clean, and you can stop at this point.
Alternatively, if you still see bits of cuticle and want even a cleaner look, you can now carefully go in with cuticle nippers and cut off the excess cuticle bits. Be very careful not to cut yourself!
4. Buff Your Nails
Lightly buff the surface of your nails to create a smooth canvas for the polish to adhere to. However, avoid over-buffing, as it can weaken the nails.
5. Cleanse Your Nails
Before applying any polish, cleanse your nails with nail polish remover or alcohol wipe to remove any oils or residues that could interfere with the adhesion. Make sure to use lint-free wipes.

Step 3: Applying Gel Nail Polish
Once your nails are prepped and clean, they’re ready to be painted! Yay!
Here are the steps you’ll want to follow:
- Apply Base Coat: Apply a thin layer of base coat to protect your nails and help the gel polish adhere better. Cure it under the UV or LED lamp according to the manufacturer’s instructions (usually around 30-60 seconds).
- Apply Gel Polish: Apply the gel polish in thin, even layers. Start from the base of your nail and brush towards the tip. Be careful not to get the polish on your skin or cuticles, as this can cause lifting. Cure each layer under the lamp. Typically, two coats are enough, but you can add more for opacity.
- Apply Top Coat: Once your color layers are done, apply a thin layer of top coat to seal in the color and give your nails a glossy finish. Cure it under the lamp.
- Clean and Hydrate: After curing the top coat, your nails might feel a bit tacky. Wipe them with a cotton pad soaked in rubbing alcohol or a gel cleanser to remove the sticky residue. Lastly, apply cuticle oil to rehydrate your nails and cuticles.
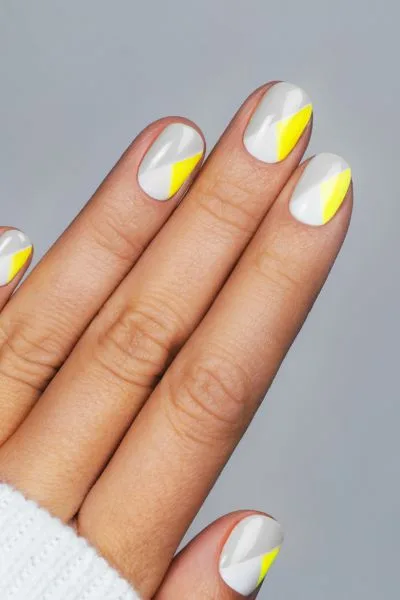
Nail Art Trends To Try
The most fun part about doing your own nails at home is that you get to play around with nail art and really unleash your own creativity! Here are some fun nail art trend examples to help you get your creative juices flowing:
- Negative Space Manicure: Leave a portion of your nail bare to create unique and eye-catching designs.
- Chrome Nails: Achieve a mirror-like finish with chrome powder or nail wraps, giving your nails a futuristic and glamorous look.
- Tie-Dye Nails: Create a tie-dye effect using different colors and a sponge, giving your nails a playful and vibrant appearance.
- Animal Print: Embrace your wild side with animal print designs like leopard spots or zebra stripes.
- Abstract Art: Experiment with abstract patterns and geometric shapes for a modern and artistic touch.
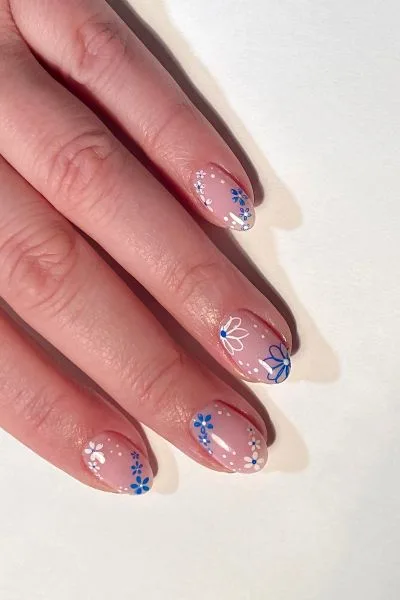
- Florals: Flowers are always popular – you can adapt them for any season by choosing different polish colors, and they’re easy enough to create with a dotting tool or a detail brush.
Related: 40+ Hottest Summer Nail Designs You Must Try This Year
Fixing Nail Polish Mistakes
Accidentally smudged your freshly painted nails? Don’t worry; it happens to the best of us! Here’s how to fix it:
- Act quickly: Make sure to inspect your nails for mistakes before curing them under the light!
- Isopropyl Alcohol/Acetone and a Brush: Keep one of your brushes just for cleaning up mistakes! Have some isopropyl alcohol or acetone in a little bowl on the side, dip your brush in it, and carefully clean up the mistakes from your nail. Once everything looks good to you, you can continue with applying nail polish and then curing your nails,
Step 4: Making Your Manicure Long-Lasting
You might think this is not an actual step that’s part of the manicure procedure, but hold up! The tips below are SUPER important for making your mani last longer than a few days. Therefore, they deserve a whole separate section!
A little extra effort can significantly extend the lifespan of your DIY nails. Here are some practical tips to maximize the longevity of your nail art:
- Wrap the Tips: After applying the base coat, color, and top coat, gently swipe the polish along the tips of your nails to seal them. This “wrapping” technique helps prevent chipping.
- Reapply Top Coat: If after a while you feel like your mani is losing its glossy surface and kind of looks dull, apply an additional layer of top coat to refresh the shine and protect your nails from daily wear.
- Wear Gloves for Chores: Whenever you’re doing household chores or using cleaning products, protect your nails by wearing gloves to avoid chipping and staining.
- Avoid Soaking Nails: Prolonged exposure to water can cause the polish to lift from the nail bed. While washing dishes or bathing, try to wear protective gloves to preserve your manicure.
- Nail Glue for Repairs: If you experience a minor chip, you can use nail glue to repair it temporarily. Apply the glue, buff it gently, and then reapply the top coat for a seamless look.
Step 5: Removing Gel Nail Polish at Home
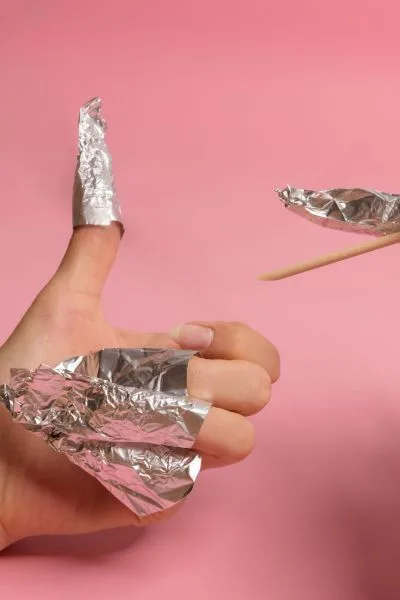
Removing gel nail polish at home requires a little more effort than regular polish, but it’s entirely doable. Here’s how:
- Buff the Top Layer: Gently buff the top layer of the gel polish to break the seal and make the removal process more accessible.
- Soak in Acetone: Soak a cotton ball in acetone, place it on your nail, and wrap it with aluminum foil to hold it in place.
- Wait and Remove: Leave the acetone-soaked cotton balls on your nails for about 10-15 minutes. The gel polish should start to lift.
- Gently Remove: Gently remove the softened gel polish using a cuticle pusher or a wooden stick. Be careful not to scrape or damage your natural nails. The key is GENTLY pushing back the nail polish, and allowing it to come off, rather than forcing it. If it doesn’t come off easily, go back to soaking in acetone for about 5 more minutes.
Another way to remove gel nail polish is to use an e-file. It’s very effective at removing gel nail polish, but it requires a bit of a learning curve and you need to be careful handling the nail drill around your skin.
Overall, it is completely up to you which method you choose as they both can do a great job removing your nail polish once you get the hang of it.
Bonus Tip 1: Most Common Manicure Mistakes
Perfecting the art of DIY manicures takes time and practice. Here are some additional common mistakes to steer clear of:
- Skipping the Nail Prep: Rushing through the preparation process can lead to uneven polish application and premature chipping.
- Shaking the Nail Polish Bottle: Instead of shaking the nail polish bottle vigorously, gently roll it between your palms to avoid creating air bubbles.
- Using Old Nail Polish: Using old and clumpy nail polish can result in streaky and uneven coverage. Invest in fresh nail polishes for the best results.
- Overloading the Brush: Avoid loading too much polish on the brush to prevent excess pooling and messy application.
- Forgetting the Top Coat: Don’t skip the top coat! Applying a good-quality top coat helps seal the color and adds shine, ensuring a longer-lasting manicure.
Bonus Tip 2: Promote Nail Health
Nail health should be a top priority during your manicure journey. Here are some additional tips to ensure your nails stay strong and healthy:
Nourish Your Nails
Keep your nails healthy by regularly applying cuticle oil or a moisturizing nail serum. This prevents your nails from becoming dry and brittle. and don’t skip hand cream! Both of these products are important for your overall nail health. Reapplying regularly will keep your hands and nails beautiful and crust-free.
Give Your Nails a Break
As much as you love experimenting with different nail polishes and designs, give your nails a breather between manicures to prevent damage and allow them to recover. During this downtime, use nail-strengthening products, and keep up with the cuticle oil/hand cream routine.


Manicure Frequency
The frequency of your at-home manicures depends on your nail growth and personal preference.
On average, once every two weeks is sufficient for most people, but depending on your nail growth and your mood you may want to do your nails more frequently or less.
It’s all about assessing the look of your nails – if they still look good and have not grown out too much, plus if you’re still happy with the design – you can easily go a few weeks with no issues!
In summary
Congratulations! You’ve now mastered the art of achieving a perfect manicure at home.
Armed with essential tools and knowledge, you can transform your nails into stunning works of art, expressing your unique style and personality.
Remember, practice makes perfect, so don’t be afraid to experiment with different nail art ideas and techniques. Whether you prefer classic elegance or bold creativity, this ultimate guide has provided you with the tips, tricks, and inspiration to elevate your DIY manicures to professional levels.
So, gather your favorite nail polishes, unleash your creativity, and embark on a journey of self-expression through the beauty of perfectly manicured nails. Happy manicuring!
TL;DR: Perfect Manicure at Home Tips
| Question | Summary |
|---|---|
| What tools do I need for a perfect manicure at home? | Nail clippers, nail file, cuticle pusher, cuticle trimmer, base coat, nail polish, etc. |
| How do I prepare my nails before starting the manicure? | Shape nails, soften cuticles, push and trim cuticles, buff nails, cleanse nails. |
| How can I promote healthy nails during the process? | Hydrate nails, use nail strengthening base coat, give nails a break. |
| What are some common mistakes to avoid during a home manicure? | Skipping nail prep, shaking polish bottle, using old polish, overloading brush, forgetting top coat. |
| How can I make my manicure last longer? | Wrap the tips, reapply top coat, wear gloves for chores, avoid soaking nails, use nail glue for repairs. |
| What are some trendy nail art ideas I can try at home? | Negative space manicure, chrome nails, tie-dye nails, animal print, abstract art. |
| How do I fix smudged nail polish during the manicure? | Wait for polish to dry, use nail polish remover and cotton swab. |
| Can I use gel nail polish at home? | Yes, but you need a UV or LED lamp to cure it properly. |
| How do I remove gel nail polish at home? | Buff the top layer, soak in acetone, remove with a cuticle pusher. |
| How often should I do a manicure at home? | Once a week or as per personal preference. |
Enjoyed this? Also read:
17 Must-Know Nail Care Tips for Strong and Healthy Nails
22 Must-Try Galaxy Nails Designs for a Stunningly Cosmic Look
Pretty in Pink: 30+ Pink Nails Ideas for Your Next Manicure
30+ Christmas Nail Ideas: Holiday Magic at Your Fingertips
30+ Autumn Nail Inspirations to Kick Off Your Fall Aesthetic!
40+ Hottest Summer Nail Designs You Must Try This Year
Share on Pinterest:
